How to Speed Up Your WordPress Website Dramatically! (Under 1 Sec Load Times)
A slow website is frustrating for you and your visitors.
We all know that, and that’s why you arrived on this page right?
In this post, I’ll be explaining exactly how to speed up your WordPress website in just 7 simple steps. This is the exact strategy I used to get my load times below 1 sec, so you can do the same for your website. Alternatively, you can watch How to speed up your WordPress website here.
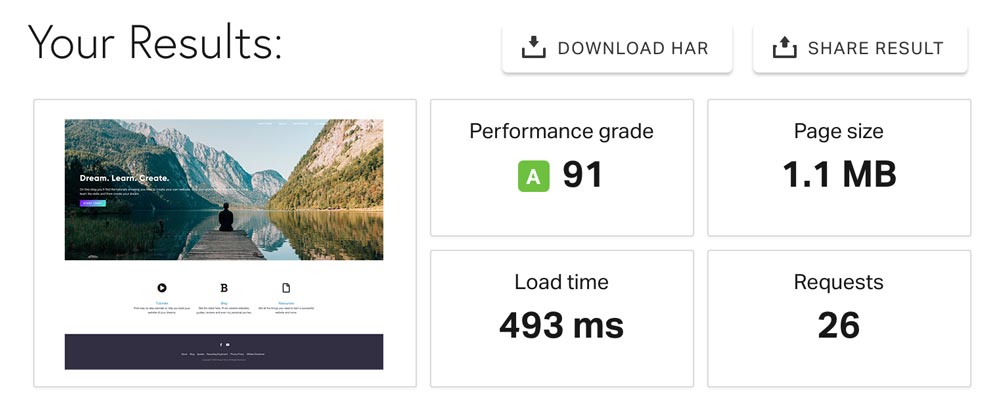
Note: This was tested on Pingdom from North America – USA – San Francisco
Important Tip: Focus on Load Times, not Score or Performance grades. It’s the end result that matters. i.e. How fast the website loads for your viewer & yourself.
#1 Switch to Faster Hosting
The truth is no matter how much you optimize your website but if your host (server) is slow – then your website’s load time won’t improve much.
For example, let’s look at Apple’s iMac Page. It’s 6.0MB in page size with a performance grade of 79 yet it loads under 1 second.

How can they possibly do that?
Simple. They are using ultra high performance servers to host their website.
Generally, when you are first starting out – you’ve probably purchased a shared hosting plan for your website. Which is totally fine, I did exactly the same – but there is a limit to the speed you can achieve on shared hosting.
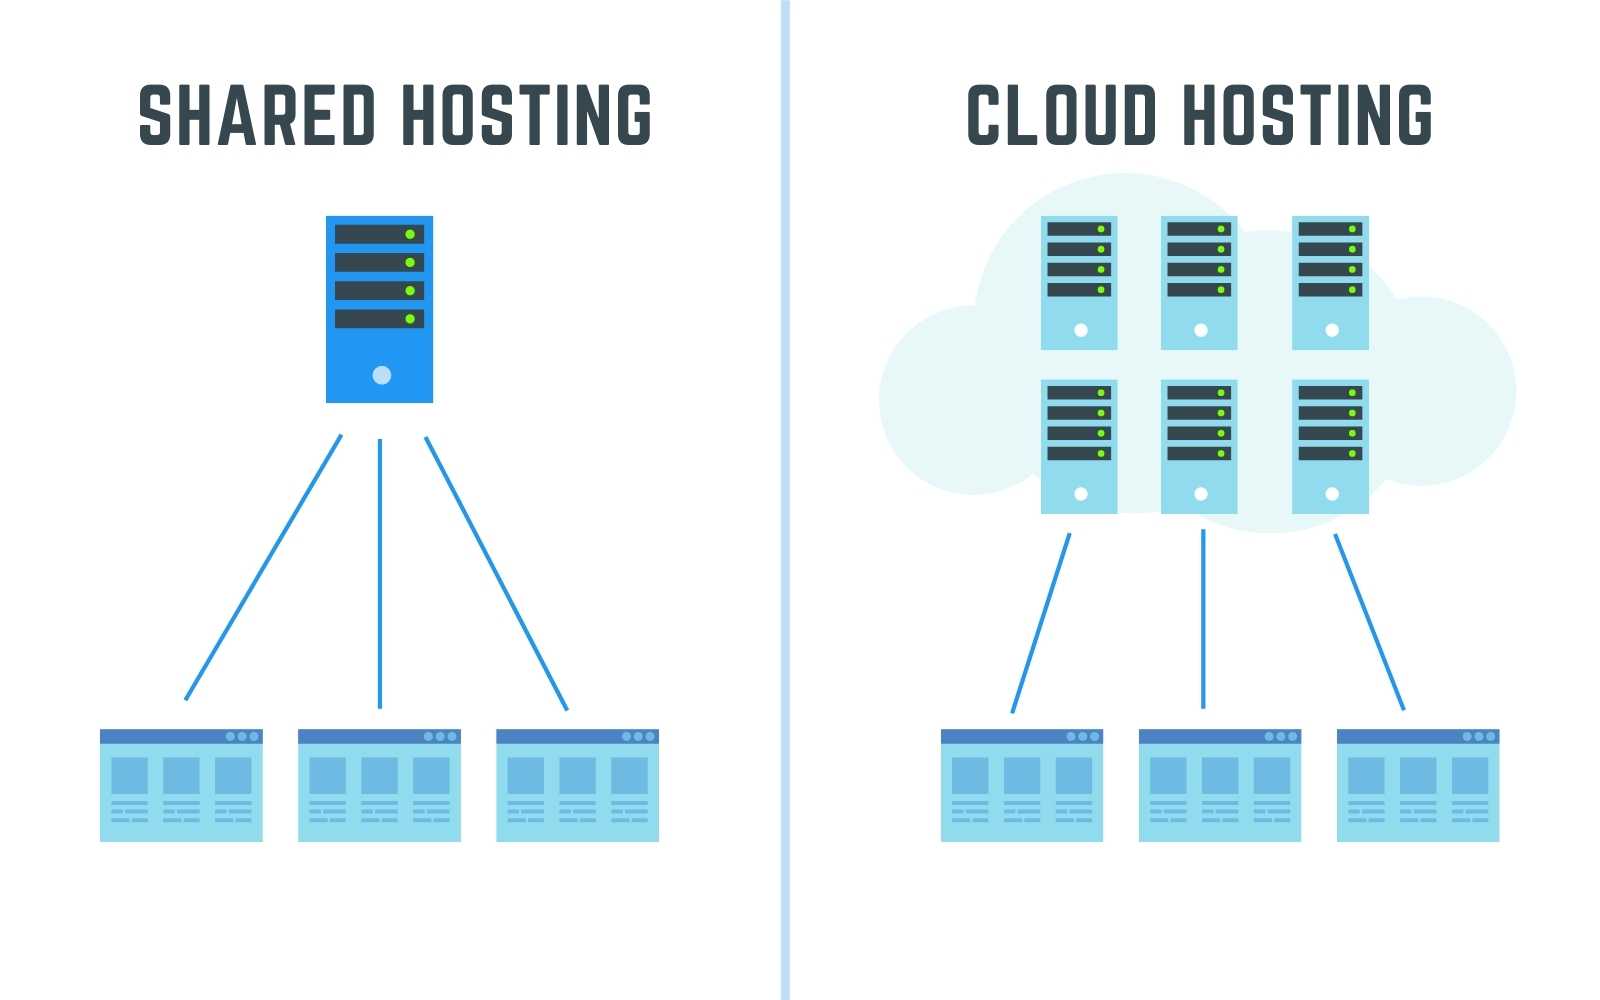
Shared hosting is a single server, hosting a group of websites. You are basically sharing the resources with hundreds of websites.
Imagine having just 1 computer in your home and your whole family using that computer at the same time. Slowww & Laggy!
So the biggest decrease on load times will come from switching from shared to cloud hosting (what I’m currently using now) – it is still relatively affordable but the performance increase is quite drastic.
It’s like comparing a bus to your own car.
So what exactly is cloud hosting and what’s the difference to shared hosting?
Cloud hosting is a cluster of servers, which work as a team to host a group of websites. Your website’s data is stored among several different servers, this means that it allows multiple computers to work together to host your website.
The major benefit of this is that it can handle larger traffic levels and spikes better since it’s distributed. And more importantly if one of the servers goes down unexpectedly – your website will still be live. (So your website will have great uptime 99.9%)
You can also scale better (i.e. If you are getting more traffic, you can increase the server resources easily without switching servers and cause downtime.)
Shared hosting is great to start off with, so if you’re site isn’t getting any traffic yet and you don’t mind too much then skip to the next step.
But if you are frustrated and you are building a website with a lot of functionality such as an eCommerce website – you should definitely consider upgrading especially since it’s just a few dollars extra per month (Starts from $10+/month)
So what I recommend is checking if your currently hosting provider offers cloud hosting (many do!) and upgrade. Because honestly, you can spend hours/days trying to optimize speed (which I did before) but go nowhere.
As you can see below, my blog post which is around 4.1MB in page size loads in around 1 second. That’s the power of cloud hosting!
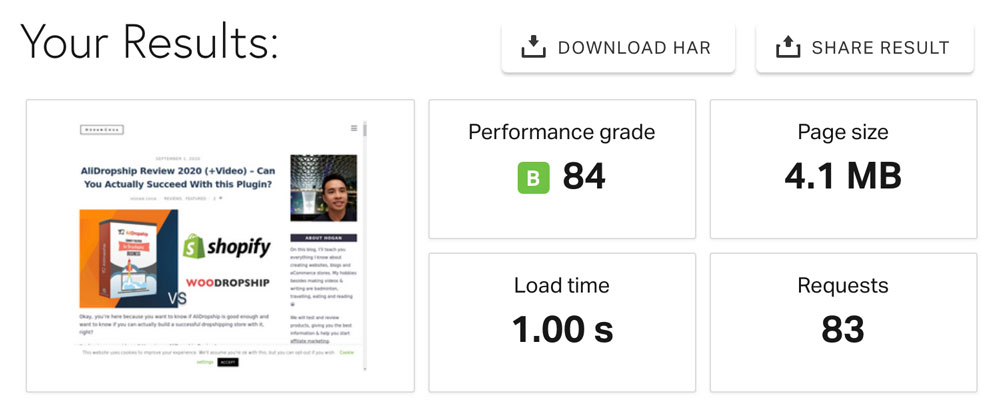
Remember: 80% of your load times/performance increases will come from server. It’s just like your computer!
My Current Setup
Back in 2010, I started on Hostgator Shared and maybe it was 2017-2018 when I switched to their Cloud Plans which were decent – but I eventually moved to Cloudways (Vultr High Frequency Servers).
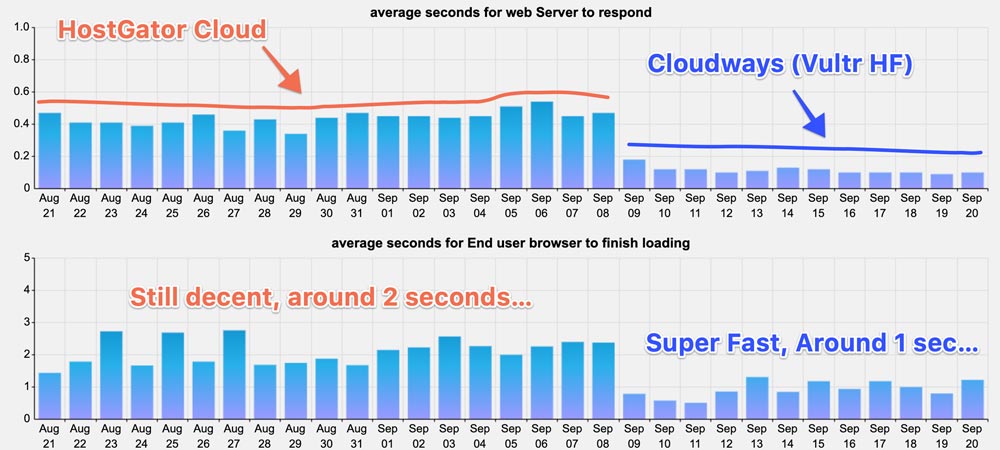
My current plan is around $13 per month which is actually very similar to regular shared hosting plans (after their initial discounts). Their lowest plans just start from just $10 per month (Digital Ocean).
Here are some key things to note:
It’s not all sunshine and rainbows, hence I don’t recommend it in my beginner website tutorials.
- They don’t provide unlimited emails
With many popular web hosting companies, you can create unlimited emails quite easily within the dashboard area.
With Cloudways, you need to pay $1/month per inbox (e.g. [email protected]) and set it up with Rackspace. But don’t worry, it’s not too hard and in this video I’ll show you how and show you how to connect it with gmail (so you can manage, send, receive from your gmail inbox).
Alternatively, you can use something like GSuite or Microsoft 365 for your emails or even get cheap hosting for unlimited emails.
- You can’t register a domain name
You have to purchase your domain name from a domain registrar like GoDaddy or Namecheap then connect it (normally what I prefer anyways, but again – it’s an extra step)
- The user area is a bit more technical
While still extremely easy to use, the initial dashboard area operates a bit differently then traditional hosts.
Overall, Cloudways offers amazing value, speed and control which is perfect for individuals or agencies. It has all the important things you normally get, such as backups, staging, easy to install SSL, security and live chat support.
Watch my full tutorial here – You can actually try it for Free (No credit card) and feel the difference!
Use Coupon: HOGAN for 10% off the first 3 months.
The next step is also a crucial part of building a website that many miss but is a big factor to decrease your load times.
#2 Reduce Image Sizes, Types & Tips
This is one of the biggest beginner mistakes that I also made early in my journey creating websites for myself.
When we first created our websites in WordPress, no one told us to crop our images to size before we uploaded and used them on our websites. Or what sizes to crop them at.
I’ve watched a ton of YouTube Tutorials and they still don’t mention it. But it’s very important, especially if you are still using shared hosting – you want to minimize your page size. And that can be done by reducing the size of images, using the right file type and choosing the right image.
Below are some good guidelines to follow:
- Hero Image – Approx 1800px width x 1000px height (Less than 500kb)
- Blog Featured Images – Approx 1000px width x 600px height (Less than 200-250kb)
- Product Images – Approx 800px width x 800px height (Less than 100-150kb)
For other images used, try to look at the visual area it will cover and then resize it accordingly based on the initial hero image size.
You can see a more visual representation here.
I normally crop my images on Fotor.com or Photoshop (save it as medium to high quality).
Note: These are just estimates that I use anywhere around that number should be good enough. Just make sure that the file sizes aren’t exceeding 1 MB+ for each image before uploading cause that’s gonna increase your storage on your hosting provider.
Type of File
Save your files as JPG for your website. Unless it’s a logo or you need an image which is transparent. (i.e. floating leaf or a picture of yourself etc) – In this case it will need to be .PNG
JPG is normally lower file size while still presenting a decent quality. PNG is used for transparent images and is going to be a much larger file size as they are higher quality.
Important to know
For an eCommerce website – for the featured images your Shop Archive Pages, try to use a simple white/grey background.
This reduces the detail in the image therefore the file size will be reduced. This will make a big impact on your page size especially if you have over a dozen products on one page.
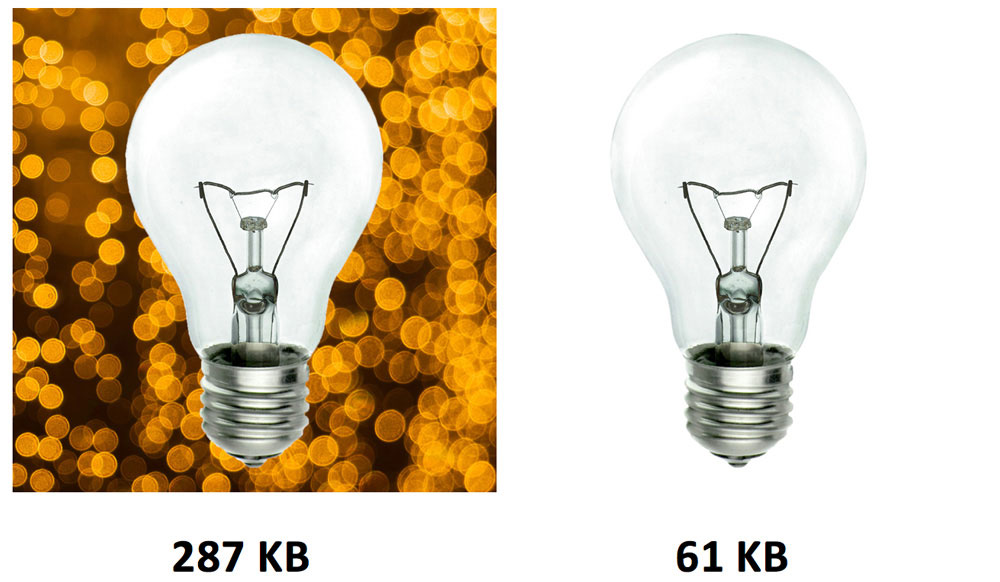
This also gives your page a very consistent and professional look. Most big eCommerce stores do this too.
Cool Tip: to achieve this on your current product images you can use a tool called Remove.bg which easily removes background. Then you can add a light grey background like #f6f6f6 on it. Make sure to save as JPG.
Nike

Amazon

Then what you could do, is that on your product pages – you can showcase more photos or video of your product in use.
You can also use WP Smush Plugin for further image compression, optimization and lazy loading images.
#3 Use a Caching Plugin
A cache is basically like temporary storage.
So a caching plugin like WP Fastest Cache basically helps you store some of your website files in the temporary storage – so that instead of loading from your server (host) all the time, it can load it from the cache. Resulting in faster loading times and reduced resources used.
So a great free plugin I recommend is WP Fastest Cache. It’s very simple and easy to use!
Generally you can just check all the settings and shouldn’t be too much of an issue, if there – you can uncheck some of the settings (most likely the minify, combine & gzip) and see which one is causing the problem.
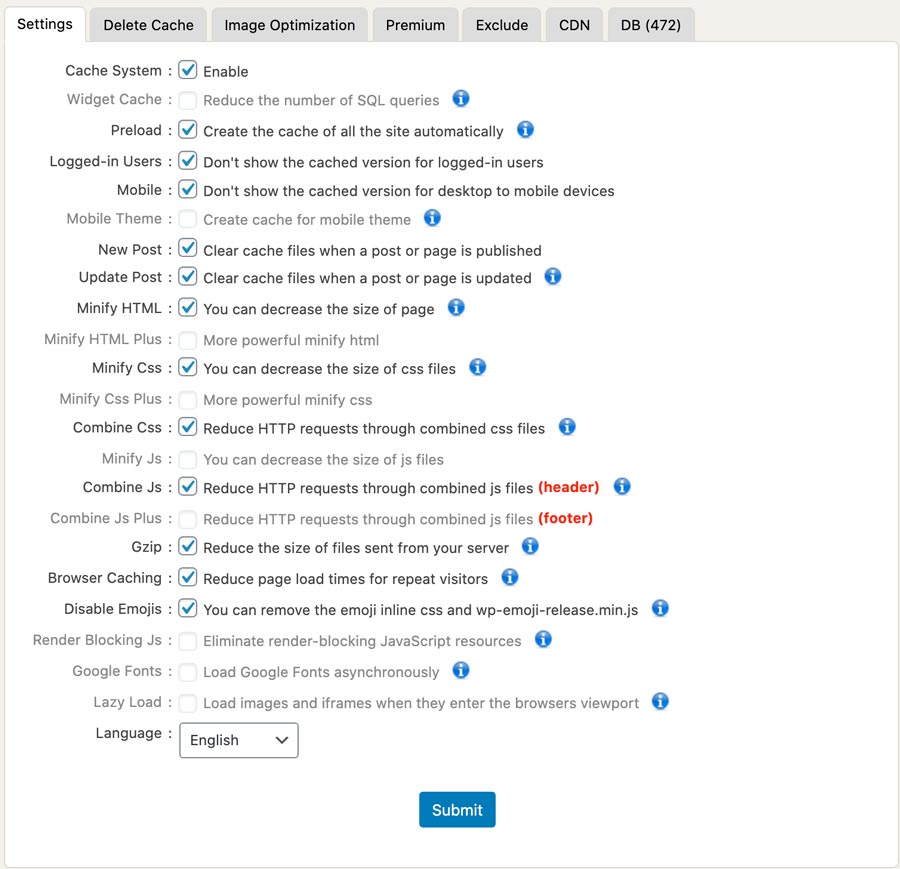
Important Tip: Make sure to “Delete Cache” after you’ve saved your settings and always view your website in an incognito window to see if it’s displaying fine.
On this current site, I am using WP Rocket which is paid but it offers more options and settings to improve your site speed. Such as: Remove jQuery Migrate, Load JavaScript Deferred, Safe Mode For jQuery, Delay JavaScript Execution, Lazy Loading for Images & Videos & many more useful features.
It also includes tutorials and email support which is awesome – they can guide you to get the best optimization for your specific website.
Note: If you are using another caching plugin already such as the SG Optimizer (SiteGround’s own caching plugin), then you don’t need another caching plugin.
#4 Delete Themes & Plugins
Make sure to deactivate/delete plugins and themes that you are not using. The more things you have, the heavier your website will be. Imagine a car, the more passengers you have and more things you are carrying the slower it will be.
A common problem that I notice is that many times people will be using a plugin that is not necessary because you can actually achieve it with the theme.
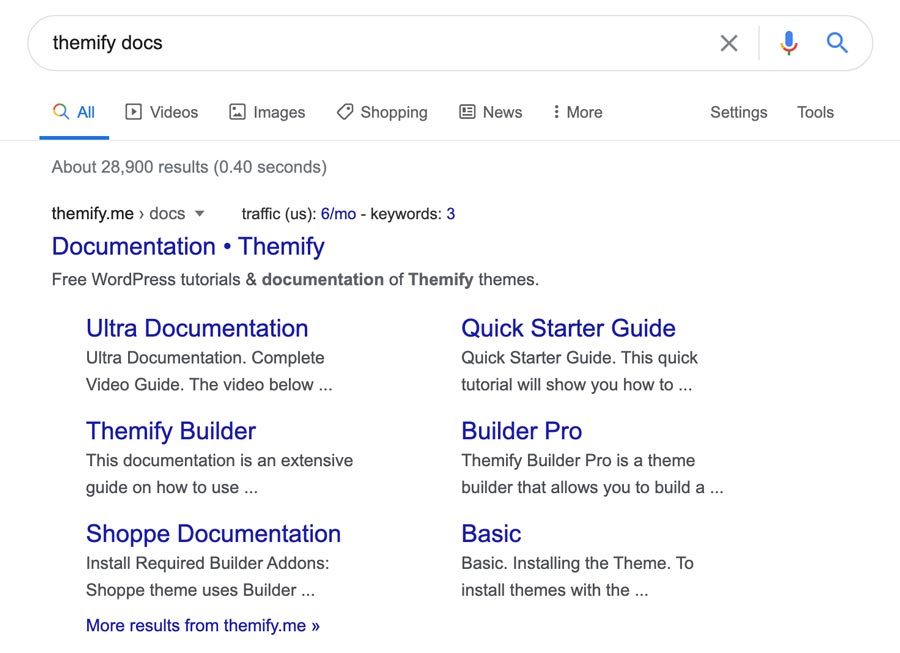
So whichever theme you are using – Search “Theme” + “Docs” in Google for the theme documentation and see if you can achieve it without an extra plugin. Plus, you can also get in touch with support since they will know which plugin works best with their themes.
Avoid Slow Plugins
When you are installing a new plugin, do a before and after speed test on pingdom – some plugins may be poorly coded or have extra features that you don’t need.
Years ago, I had installed disqus comments plugin since everyone was using it but as I was optimizing my site for speed – I realised it slowed down my site a lot!
So, I deleted it and now my blog posts are loading much faster. If you are wondering, I’m just using the default WordPress comments and Akismet to avoid comment spam 🙂
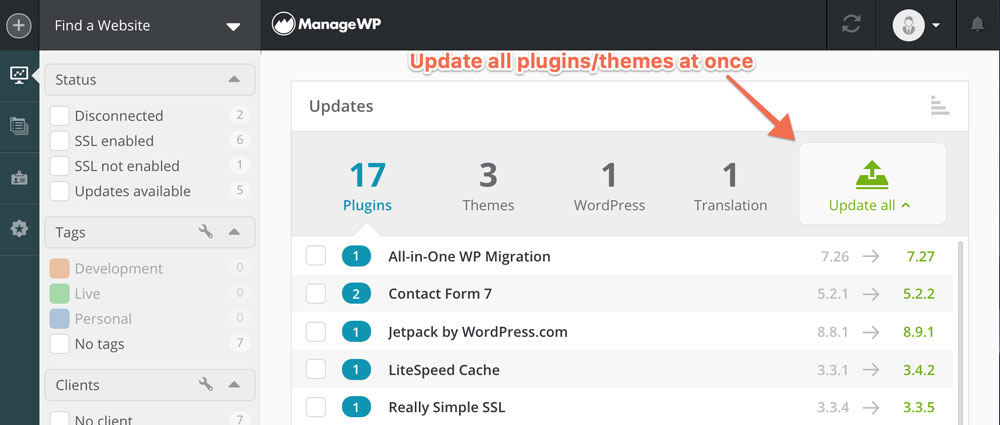
Another issue I have with plugins, is that sometimes if they are not-updated they are prone to getting hacked. So what I recommend if you have a lot of websites is to use ManageWP Worker and ManageWP. This plugin basically allows you to connect it to ManageWP where you are able to update themes/plugins all in one place. Lifesaver!
A Note About “Heavy” Themes
Some posts/tutorials will say to use a lightweight theme, in my opinion – most themes with a lot of features and tools will be “heavy”, in the long term it’s better to have a theme that can achieve most things. Cause it actually reduces the amount of plugins you need and conflicts later.
With that said, do what works best for you. If you just need a very simple blog/website for the long term – A very basic theme might work well for you too. Or use a theme very specific to needs for your website. For example, I’m using the Ultra theme by Themify which is a fast multi-purpose theme but I probably wouldn’t use it for a car directory website etc.
#5 Reduce Javascript/Code
Basically the more stuff you add, the more code that needs to load.
So try to reduce any animations & fancy features unless you really need it.
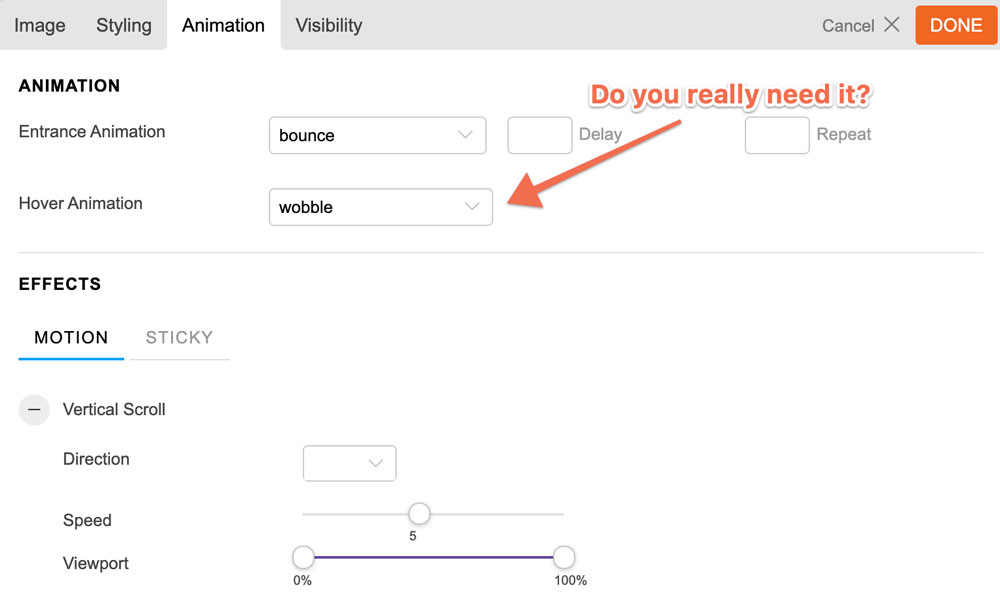
Over time, themes will add many new features (bells & whistles) as requested from their users but this doesn’t mean you need to use it.
I recommend keeping it simple because it’s also much easier to maintain.
#6 Change Server Locations
Your server location is going to have a big impact on loading times. The further away, the more distance the data needs to travel to reach your end user (visitor).
So if you choose a host who has servers close to your visitors, then it should load faster.
However, not all hosts will have this ability. For example Hostgator/Bluehost have their servers located in the USA.
- To check where your server is located you can use: Check-host.net
- If you are not sure, where the majority of your visitors are coming from – then make sure to connect your WordPress to Google Analytics. You can use the Google Site Kit Plugin for this.
- Get in touch with your host and see if they can move you to the closest server to them. If not, you may consider a host change, alternatively you can set up and use a CDN which I will touch on next.
If you are considering a host change, here is a list of the ones I have used:
Siteground – More premium but one of my favourite shared hosts. It has 6 data center locations: USA, Singapore, Australia, UK, Germany & The Netherlands.
Hostinger – Another extremely affordable hosting provider which has data centers in USA, UK, Netherlands, Lithuania & Singapore. Watch my review & tutorial on Hostinger.
Bluehost & Hostgator – located in the USA, so if your audience is there then those are popular budget options especially for blogs.
Cloudways (Managed Cloud Hosting) – has the most data centers available. Roughly, 67 data centers among 5 major cloud infrastructures. So wherever you are based, you will be able to choose one which is closest. Watch my full review & tutorial on Cloudways.
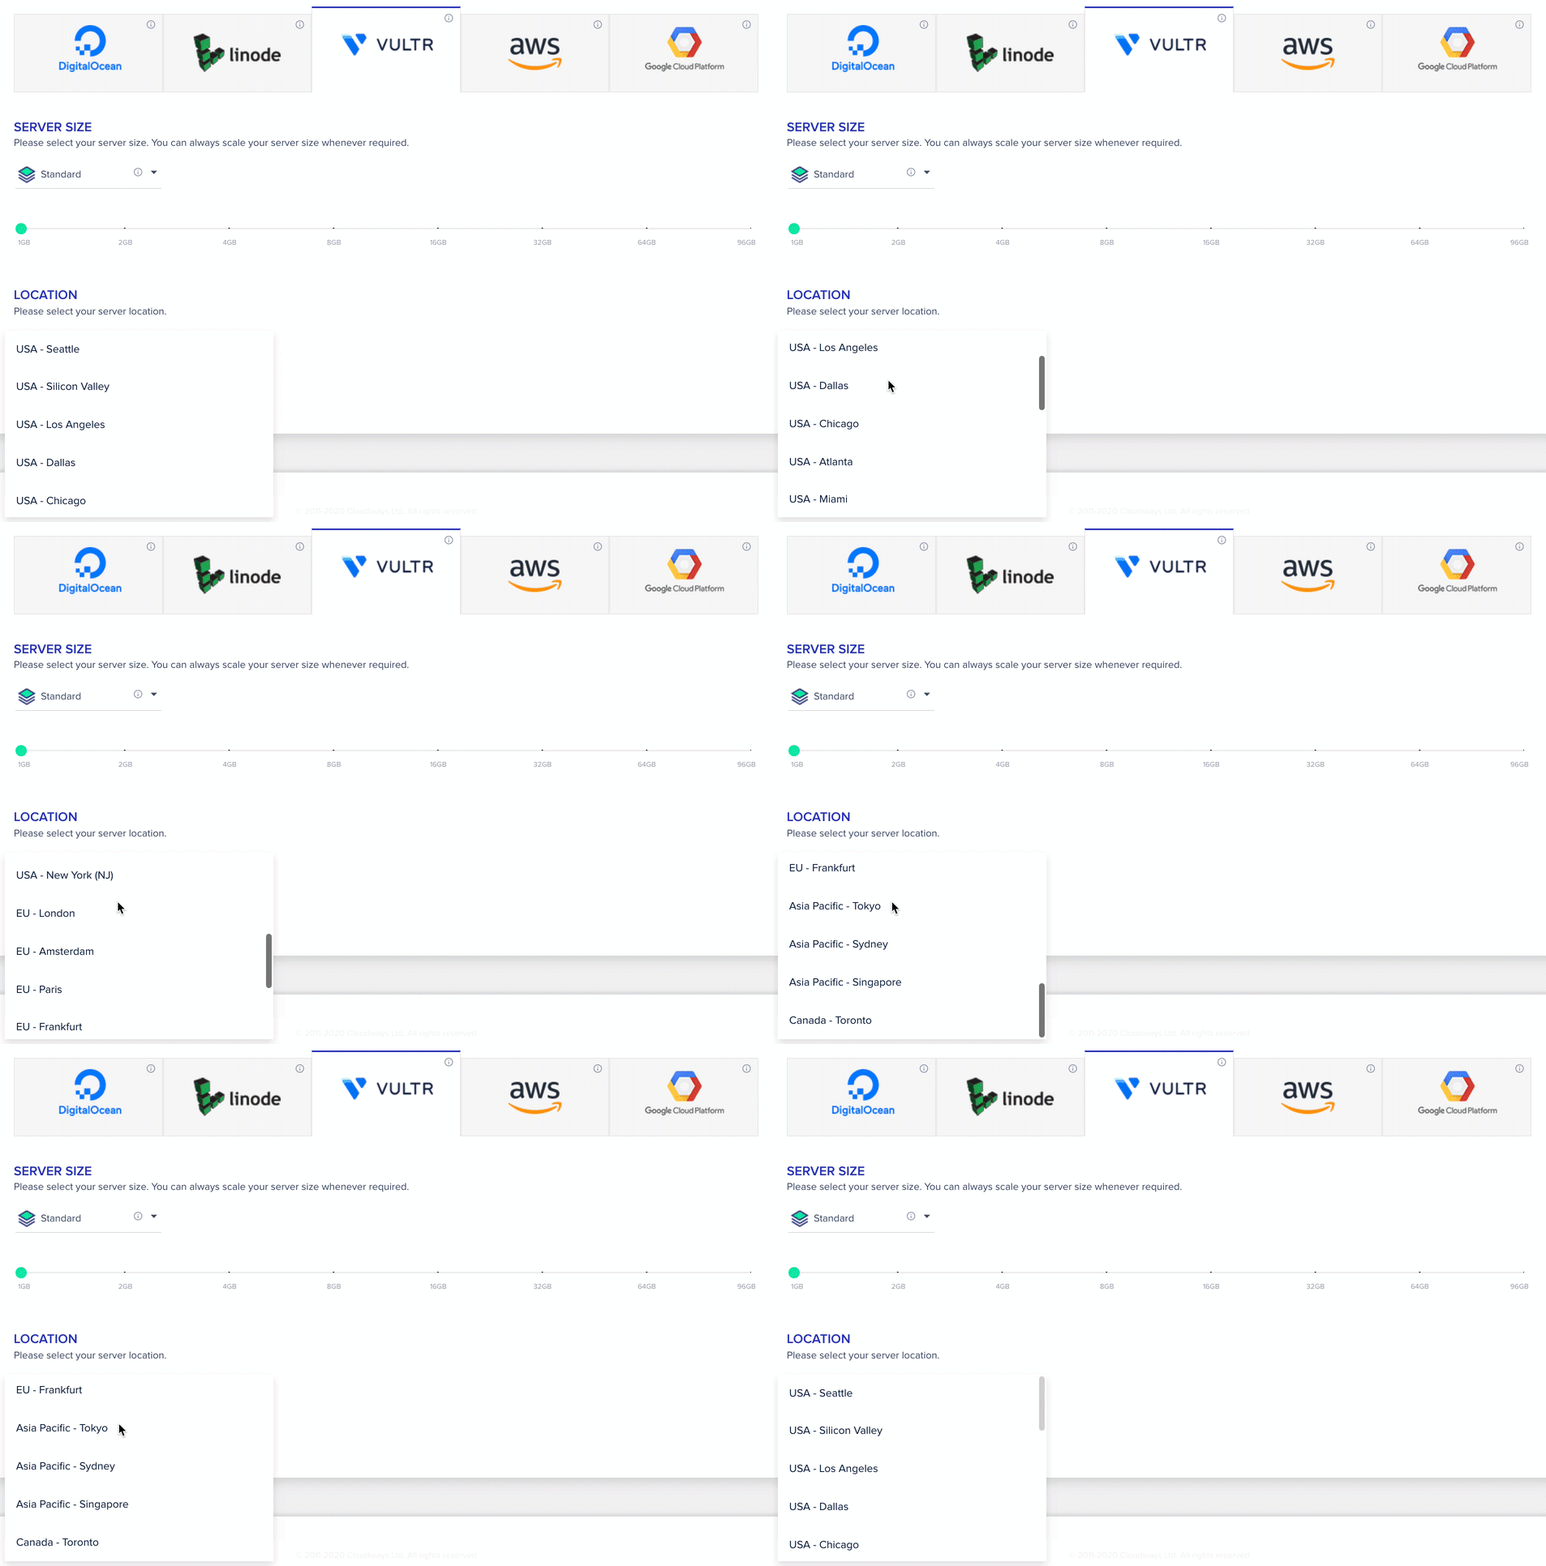
Something I really like about Cloudways is that you are able to create new servers (with a different location) easily within one account.
So for example if you have clients all around the world, you can launch several servers and add your clients site into the server which is closest to their visitors. And you can easily increase your server resources if your client’s site is getting alot more visitors.
#7 Use a Content Delivery Network
A CDN is basically a network of servers around the world which can store your websites data so it can load faster for the end user. It brings the server closer to them.
You can learn more here: https://www.cloudflare.com/learning/cdn/what-is-a-cdn/
- Sign up to Cloudflare (Free/Paid) or StackPath (Paid), both are good.
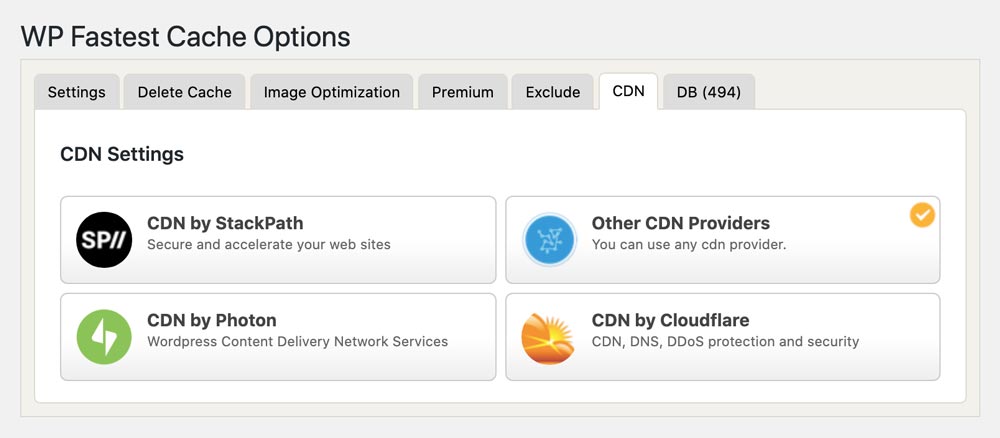
- Add the CDN URL or API into Plugin (e.g. WP Fastest Cache)
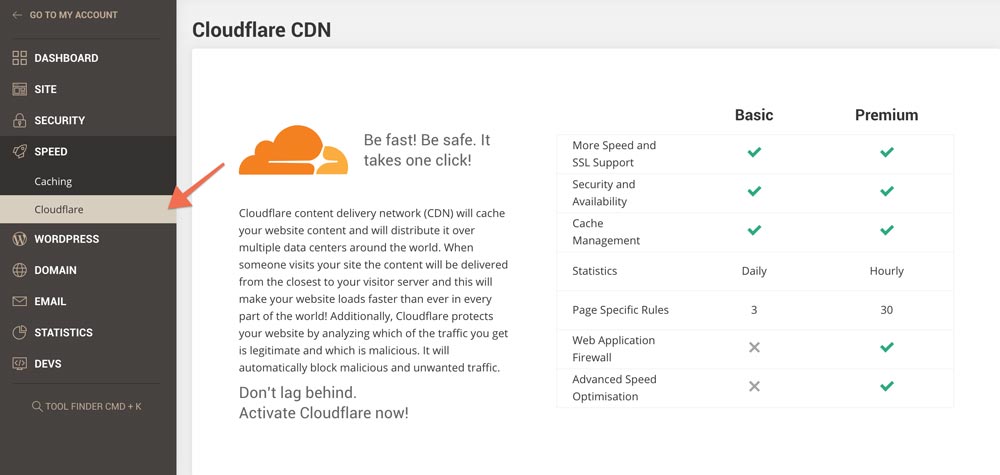
CDN integration with SiteGround can be done within your account since they include it within their plans. You can visit “Site Tools” and it will be under “Speed” > “Cloudflare”. From there you just need to activate it.
Note: After integration Siteground & Cloudflare if you notice your website not showing – you may need to set your SSL settings to “FULL STRICT” & Purge Cache.
#Bonus Tip – Update PHP Version
Ensure that you are using the latest PHP version, PHP 7.4 is significantly faster than the previous versions, and with faster execution times and less memory usage.
Please note: Sometimes updating may break your site, since some older plugins/themes which haven’t been updated may cause a conflict. So try to update everything before you update.
Where to update?
Generally, this can be done in your Hostings’ cPanel area > PHP Manager > From there you can select the PHP version.
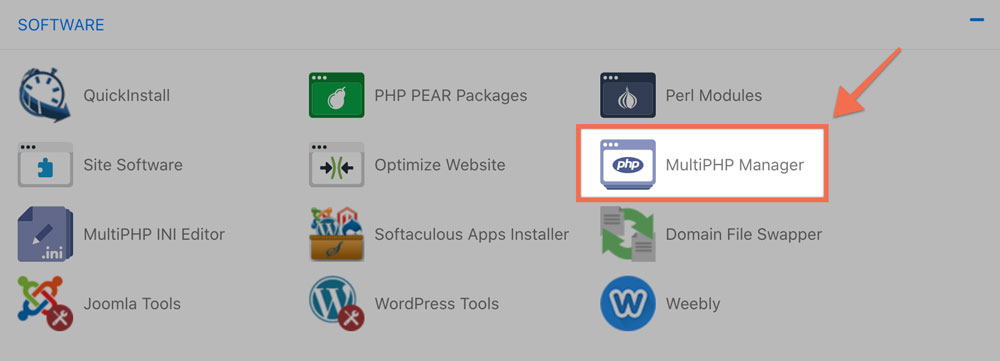
For SiteGround it will under Site Tools > Dev > PHP Manager
Each host is different, so you can search “Change PHP” in the search function of your host and that will take you to the article with the exact steps.
Once you’ve made the update, check your website if everything is working correctly – if not revert back to the 2nd newest version it should be the most stable in most cases.
Summing Up…
Anyways, thank you for getting to the end of this post. And hopefully you’ve been able to increase the speed of your WordPress website.
You can also watch my full video tutorial: How to Speed up your Wordpress Website.
However, if you are still experiencing slow speed & performance, I highly recommend trying Cloudways for Free. You can test the speed yourself in the staging area and even migrate your website over to see the difference.
You’ll see a noticeable difference in load times but also a lot in the backend area (navigating your dashboard area and building your website will be a much smoother experience.)
Use Coupon: HOGAN for 10% off the first 3 months.
Let me know in the comments how it goes! And if you have any other suggestions I’m happy to hear.

April 23, 2021 @ 12:00 am
Hi Hogan,
This article is great. I am just started to learn SEO or Digital Marketing stuff. Do you have a tutorial on how to load fast the backend area of a WordPress area?
Many thanks
April 23, 2021 @ 11:03 am
If the backend is slow, I’d recommend getting cloud hosting (e.g Try Cloudways) – You can get a 3 day free trial to see the speed of it – follow this video: https://youtu.be/XHZ9Vjvzuw4?t=214
Let me know how it goes.