How to Create an Free Email Account in Siteground & Connect it to Gmail
In this blog post, I’ll be walking you through step by step in creating a professional domain email in Siteground. Then I’ll show you how to connect it with Gmail so you can fully manage it there and send emails.
So besides from being more reliable, trustworthy, and easier to remember for customers and clients by having your own professional domain email.
It’s also crucial in preventing warning messages.
For example, If you are running an eCommerce website running on WordPress & WooCommerce and you are using your gmail account.
Then the order confirmations sent to your customers will show a “Be careful with this message” warning (see below). And this isn’t the best in portraying a “professional & trust worthy” brand.
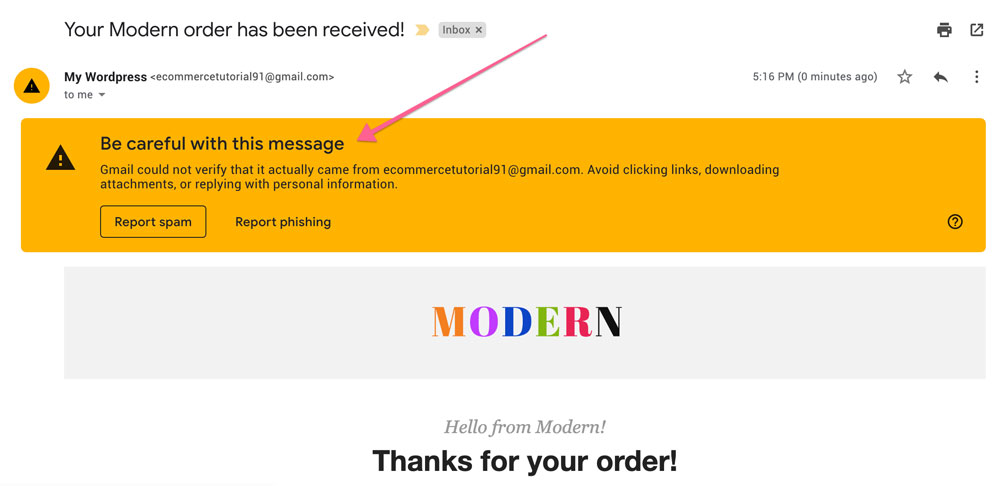
However, if the confirmation email is being sent from your own domain e.g. [email protected] It will prevent that and make your life a lot easier.
And I’ll also show you how to connect it to Gmail – so you can easily manage and send emails from there too. It’s much better than the default (old) option provided by hosting providers.
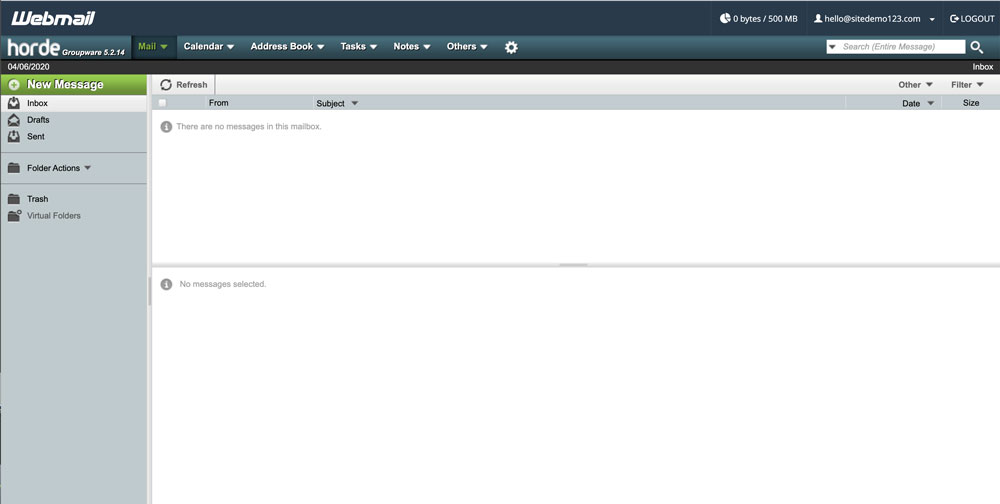
(Default Horde Email Interface)
Anyways, let’s get straight into it.
Step 1: Login to User Area
Login to Siteground: https://login.siteground.com/
New Interface (New Site Tools)
- Navigate to Websites Tab
- Click on Site tools
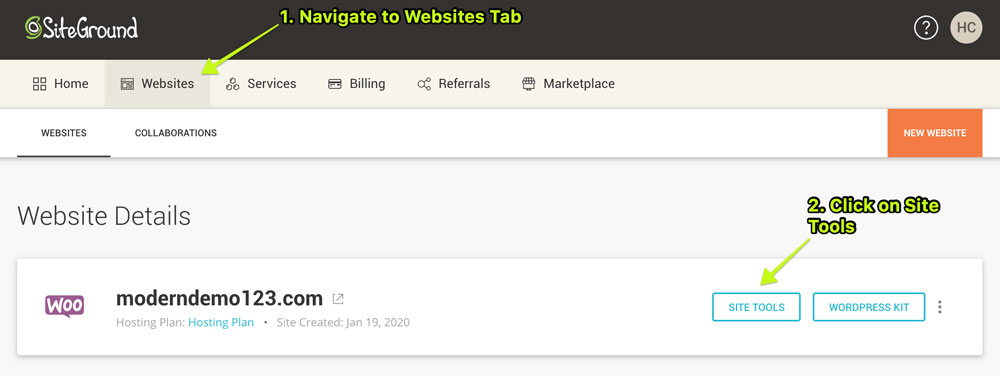
- Navigate to “Emails” > “Accounts” Tab

- Done, now we will connect it with Gmail.
Old Interface (Cpanel)
- Navigate to My Accounts, then to Cpanel.
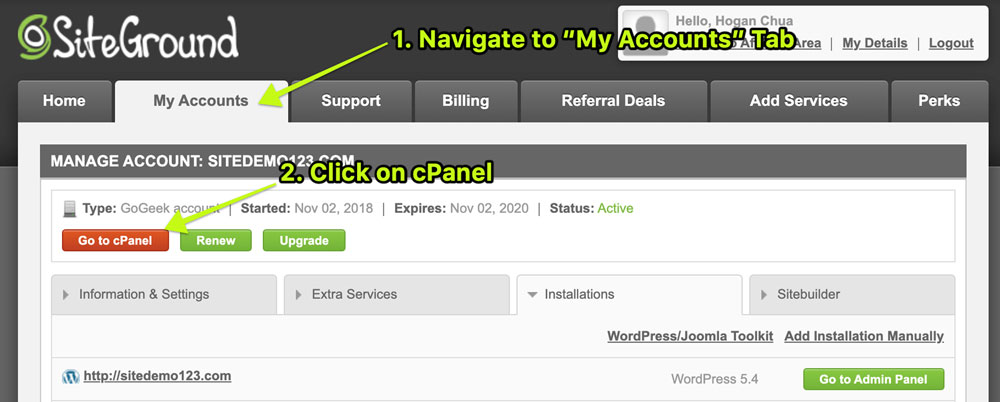
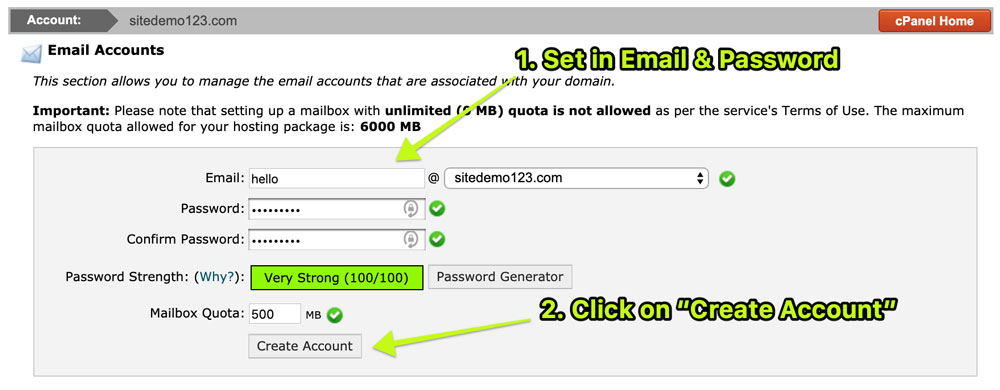
- Click on “Email Accounts” (Scroll down to “Mail” Section)

- Set in your email address. E.g. [email protected] or [email protected]
- Set in a password
- Set in a quota (storage) eg. 500mb or 1000mb
Done! Now we can connect it with Gmail so we can manage everything there.
Step 2: Setup Forwarding on Gmail
(This will download the emails from your domain email, so you can read it from Gmail)
- Login to Gmail
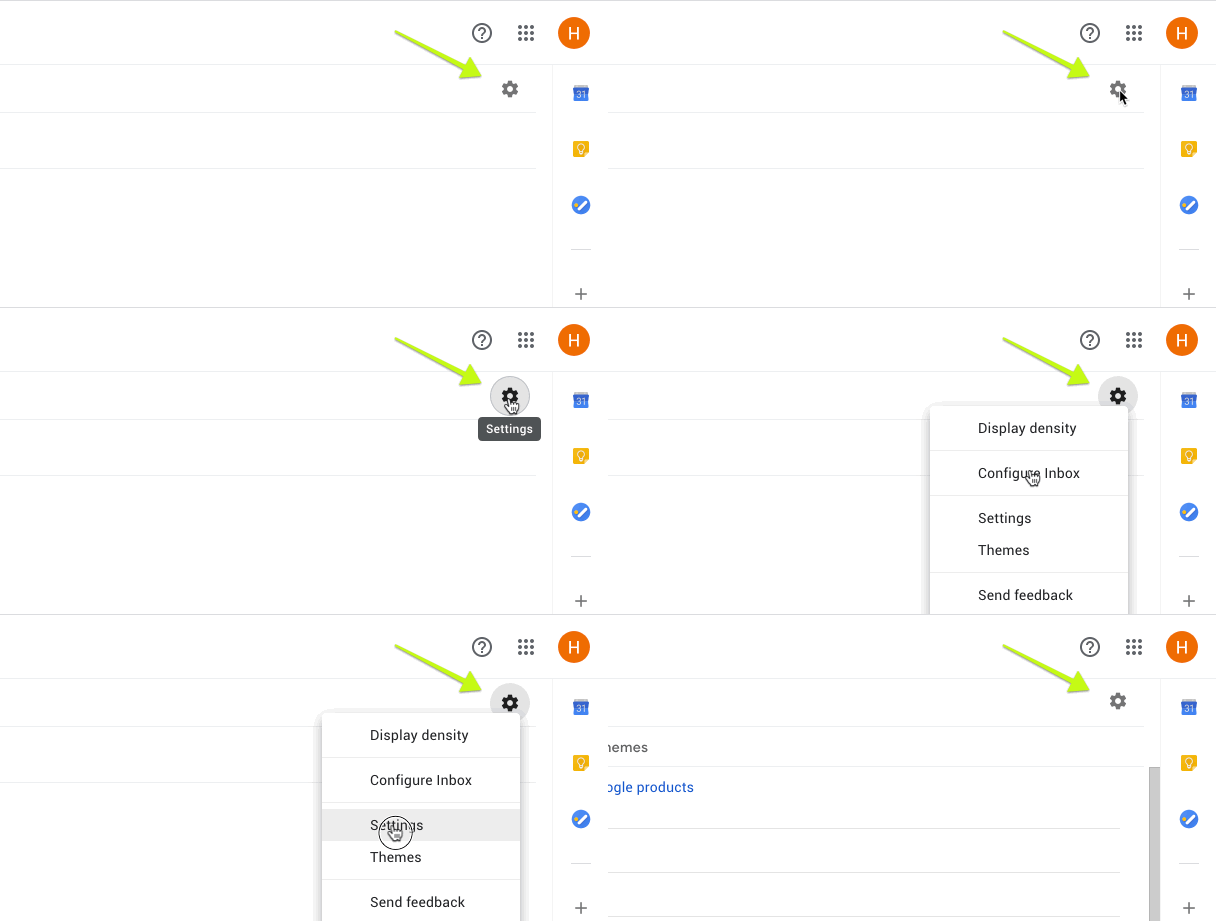
- Navigate to the “Gear icon” and Click on “Settings”
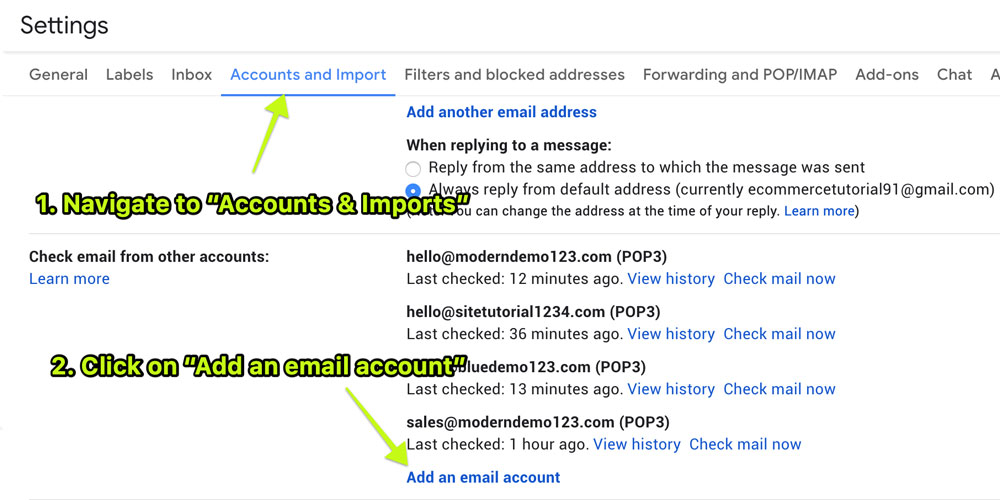
- Navigate to “Accounts & Import”
- Scroll down to “Check email from other accounts”
- Click on “Add an email account”
- Enter your email which you’ve created before
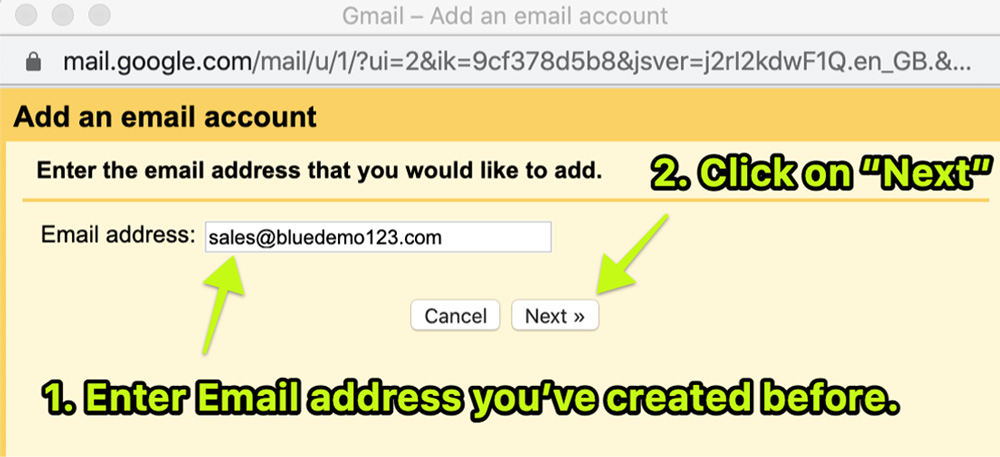
- Set in your email address as “username”
- Add password
- Pop Server: yourdomain.com & Port 995
- Select “Always use a secure connection (SSL)” and “ Label incoming messages”
- Click “Save Change”
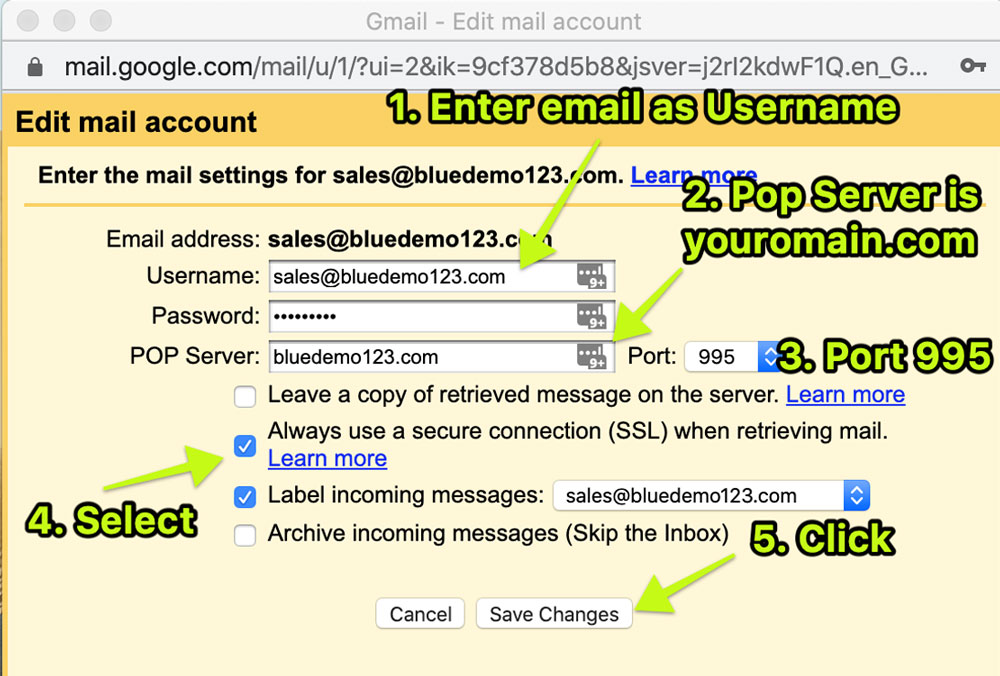
Done! Now you will receive the emails sent to your domain email into your Gmail Inbox for easy viewing and management.
Next step, is to allow you to “send emails as”, which is a must have!
Step 3: Setup Outgoing Emails
(This will enable you to send emails via your domain email from your Gmail account)
- Automatically after setting up your forwarding, you’ll be prompted to setup “send as” functionality. If not, please navigate to “send mail as” and “add new email…”
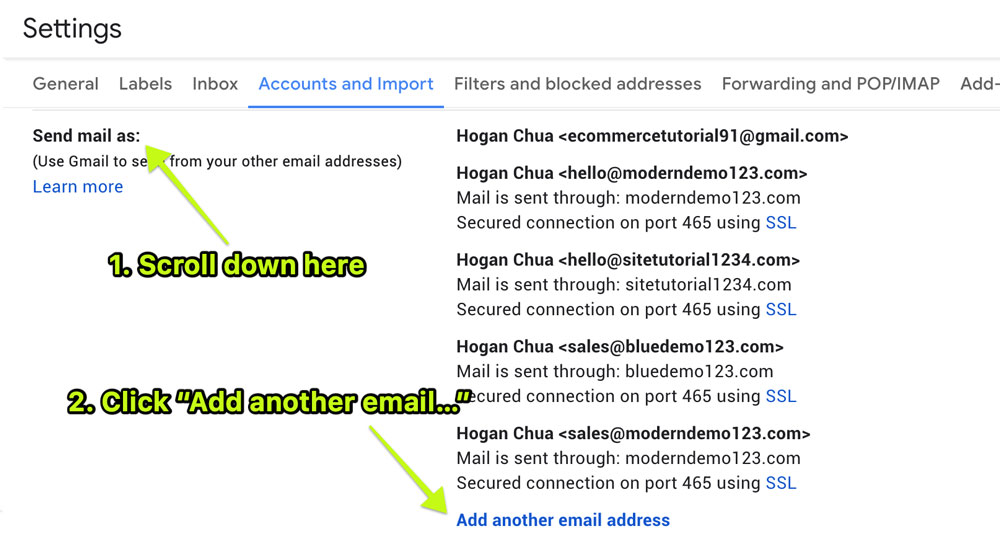
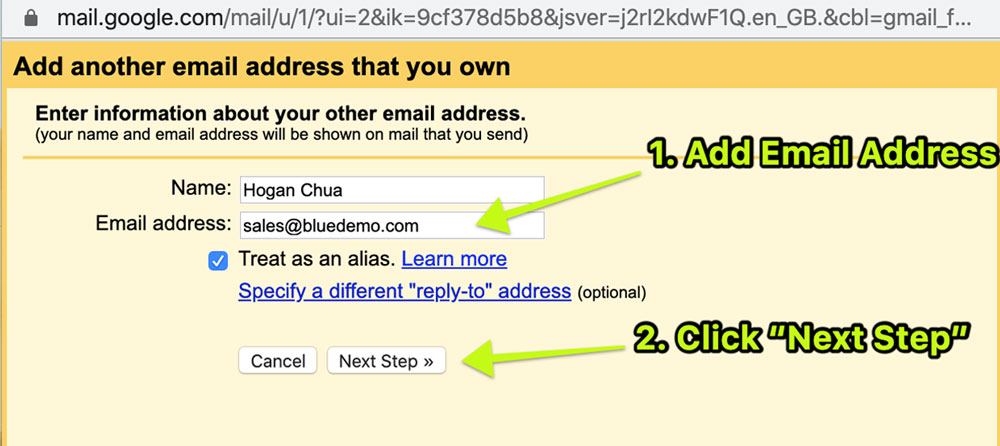
- Add email, check name and click on “next step”
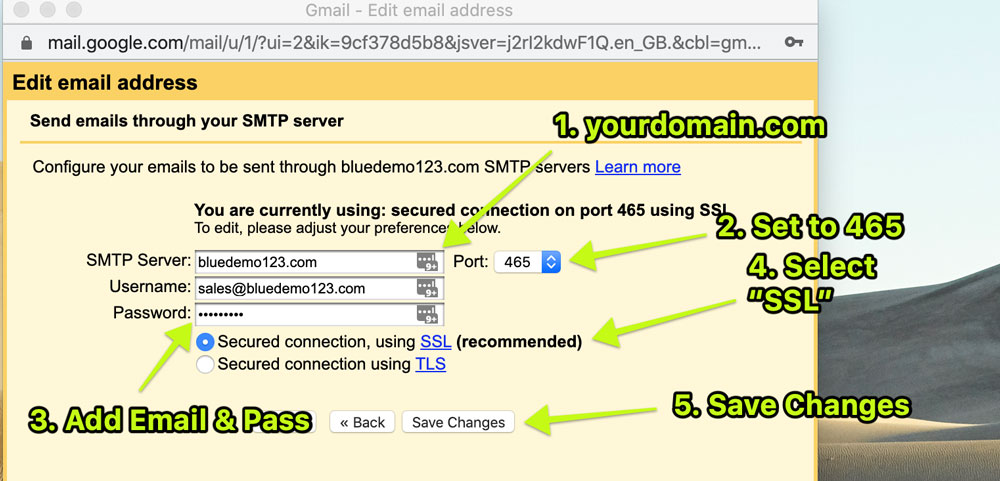
SMTP server = yourdomain.com
Username = email address
Password = you password you set before Port = 465
- Set to “Always use SSL”
- Click on “Save changes”
- In the next few minutes, you’ll receive an email to confirm you are the owner of that email address.
- Click the Link within that confirmation email.
- Done!
Prevent Warning Messages (WooCommerce)
For everyone who is using WordPress & WooCommerce, you can also update your website – with your new domain email.
Step 1: Login to your WordPress Dashboard
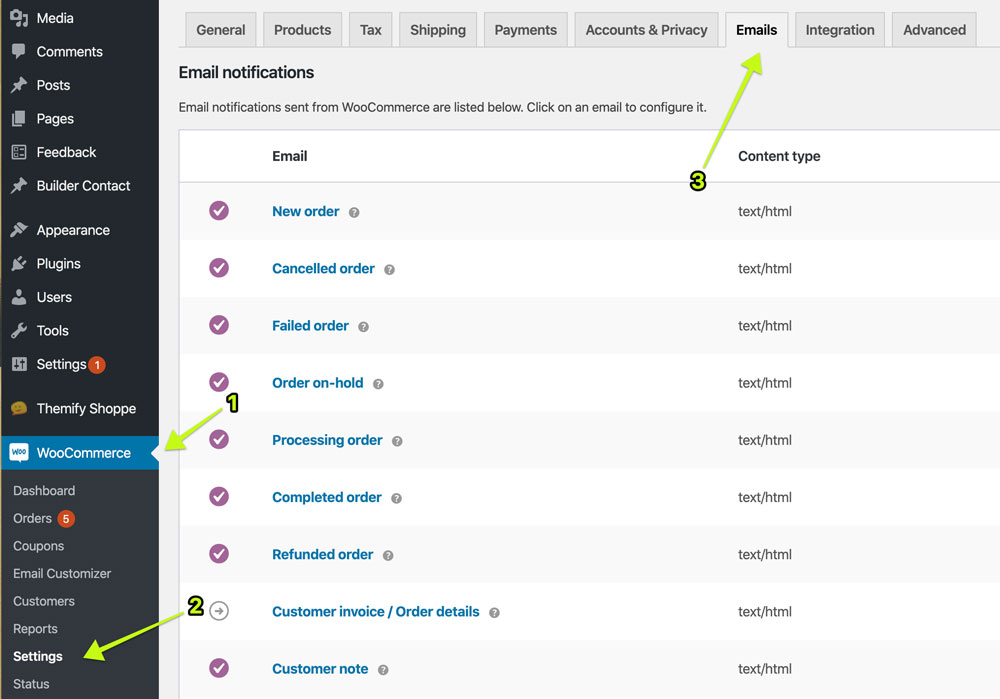
Step 2: Navigate to WooCommerce > Settings > Email Tab
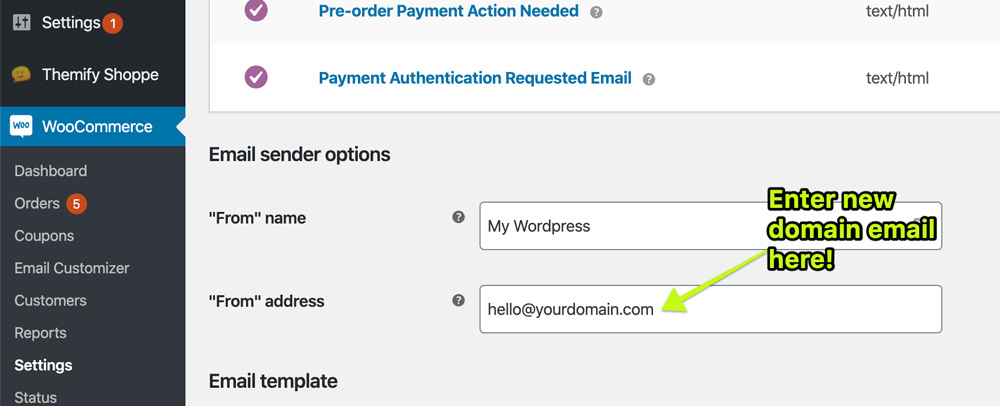
Step 3: Scroll down, change to your new domain email.
That’s it, congrats.
If you have any issues, leave a comment below!
Also make sure to check out my Youtube Channel for more videos about WordPress, Web Design, eCommerce, Plugins and more.
September 9, 2020 @ 9:45 am
Let me know if you guys have any issues 🙂
January 2, 2021 @ 9:17 pm
Hello Hogan ..
Impressing when i try to read and following your tutorial in a wordpress best practice..
Btw in your YouTube channel in tutorial videos , i’ve seem the part you saying about Bali..
I’m Indonesian .. so i that part make me prode and happy ..
Btw thx for your tutorial ..
Cheers